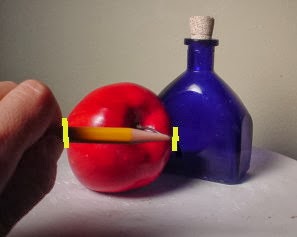
Look at what you are drawing
Remember it is called observational drawing, ensure you are constantly looking at your object when drawing. Draw what you see, not what you imagine your object to look like.
Unit of measure
Before drawing anything, look at your object and establish a
unit of measure, use this to create a comparison between the scale of one
object or part of an object in relation to another. The video on the home page will explain this further.

Sketch basic outline
after measuring and marking out small marks on your page for the height and width of your object, then sketch the basic outline using your light pencil, do not include tone or details at this stage.

Be mindful of perspective
Perspective
Perspective is a drawing method that shows how objects appear to get smaller as they get further away.
Objects are drawn disappearing towards "Vanishing Points".
Vanishing points are located on the horizontal lone or eye line. this is an imaginary line, level with the viewers eyes.
objects drawn above the eye line appear as if you are looking up at them, those below the eye level appear as though you are looking down upon them.

One point perspective
- lines converge towards one vanishing point.
- generally used when look down something long, like a road or corridor.
- sides, top and bottom of objects converge towards vanishing point.

Two point perspective
- two vanishing points are used, both located on the horizon line.
- all lines (except curving or irregular lines) are drawn as either vertical, going towards the vanishing point.
- this is a very realistic drawing method.
Beware of Ellipses
Ellipses – the oval shapes that are visible at the top of cylindrical objects such as bottles or jars – frequently ‘trip up’ a weak drawer. They can send an immediate signal that a student is not looking at what they are drawing. All ellipses, no matter what angle they are viewed from, should be rounded (not pointed) at the ends, as illustrated in this image.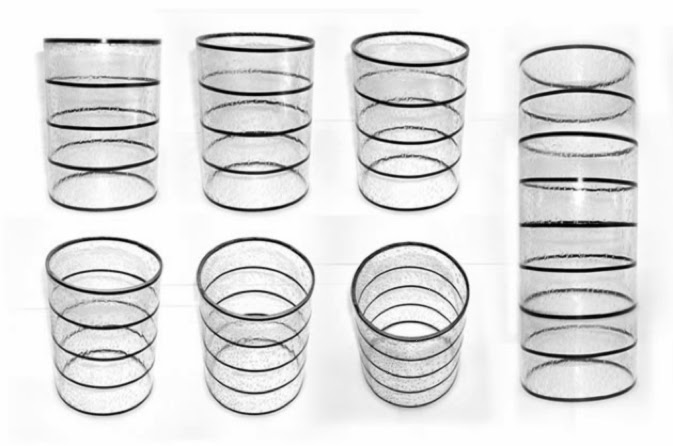
Put some distance between you and your drawing
Once you have drawn the outline of your object, stand up, your work can often look different when you put distance between yourself and your drawing. While standing, evaluate and reflect on this what you intend to change, is your object too small on your page? is there a mass of negative space surrounding your drawing? check the proportions of one area of your drawing in relation to the other. reflect on your perspective,
Now make the necessary changes.
Include extra surfaces
When drawing man made objects, look carefully at your object. You will have drawn the main body of the object, now include the extra surfaces, for example, when drawing a cup, include the rim at the top and the extra surface/edge on the handle, this will produce form in your object, before you even begin to incorporate tone.

Begin tonal work
Before attempting to add tone to your drawing, you firstly have to be aware of where the light is hitting your object. do you have a lamp over your object for increased contrast in tone, is there natural light from a window etc. does light hit the object in several areas or is it directly from one source?
Draw a tonal chart, and identify the pencil tone that you can use for highlight, mid tone and shadow.
Experiment with mark making, moving the pencil in the direction of the contour of the object that you are drawing, hatching, cross hatching etc, everyone will have a slightly different style of drawing, experiment and you will discover the style that suits you.

Tips for tonal drawing
- If you are having trouble identifying the highlights, mid tone and shadows within an object, squint your eyes slightly, the dark areas will appear darker and the light, lighter.
- Another good idea when you are learning to identify tone within an object, is to photograph the object and change the photograph to black and white/greyscale, this will allow you to identify the tones in a very obvious way, as you become use to drawing, recognising tone will become much more simple.
Texture
Experiment with texture; texture refers to the surface quality of an object - how something feels. In our drawing we are trying to recreate the texture of our object using our pencil and other drawing materials. Below you will see a textural project, try experimenting with some of the textures below or others that interest you.
Media
Utilise a variety of media when drawing, this will allow you to discover the media that suits your style of drawing and it will keep drawing interesting for you. Media types include pencil, pen, colouring pencil, watercolour pencil, paint, graphite, charcoal, oil pastel and chalk pastel. Remember, if drawing with colour, you are not simply "COLOURING IN"!!!!!!! Apply your knowledge of colour blending and complementary colour mixing, select a range of colour tones, e.g. when drawing a yellow object you should have the following; light yellow, medium yellow, mustard, light brown, brown, the complementary colour of yellow - purple, and depending on the object or lighting around the object, perhaps a green or orange.
Junior Certificate observational drawing
Click on the following link, to download a list of objects, as suggested by the Department of Education, to practice drawing as you study for your junior certificate drawing exam.